Laurel Fork Falls

Lake Jocassee Laurel Fork FallsA couple of weeks ago we went on one of my favorite South Carolina runs of all time. My ideal run is challenging, but not demoralizing, extremely beautiful and interesting all along the way with plenty of variety and an incredible destination that helps pull you along and tempts you further. Also, it’s within a reasonable distance (no more than an hour or so) of decent pizza so you have hope instead of despair as your bloodsugar begins to crash and you realize you’re very underprepared in the snack department. :) This had all of that! It was magnificent.

trail runner on the foothills trail heading to Lake Jocassee and Laurel Fork Falls
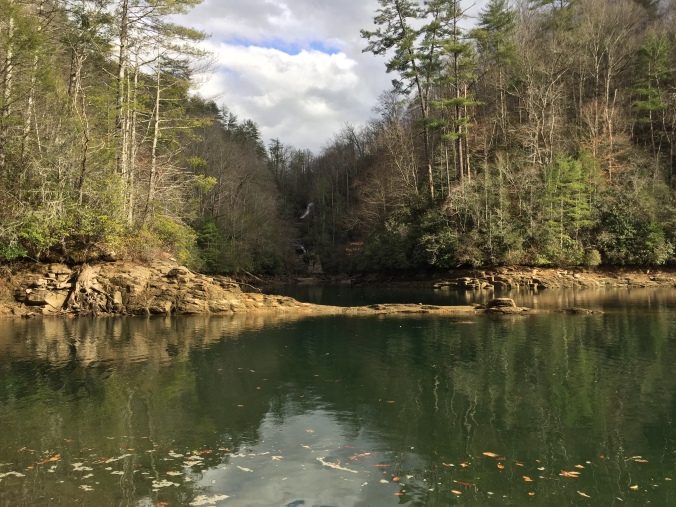
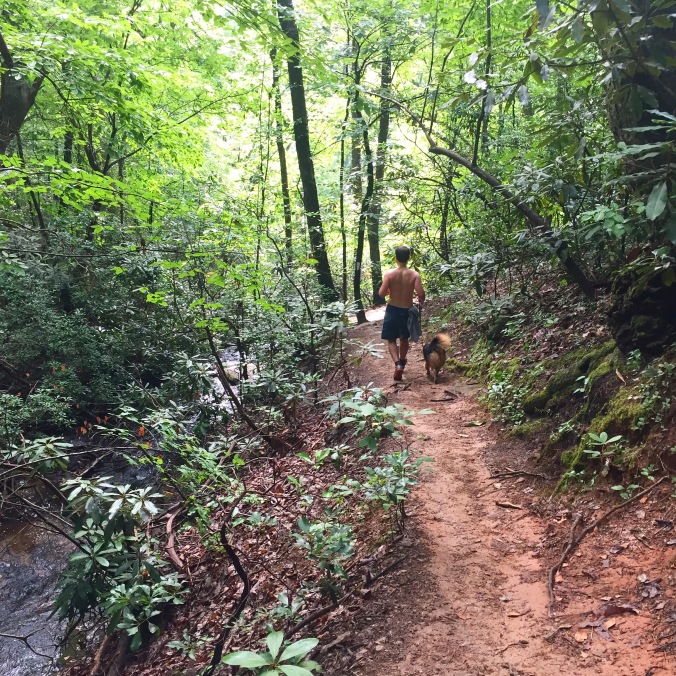
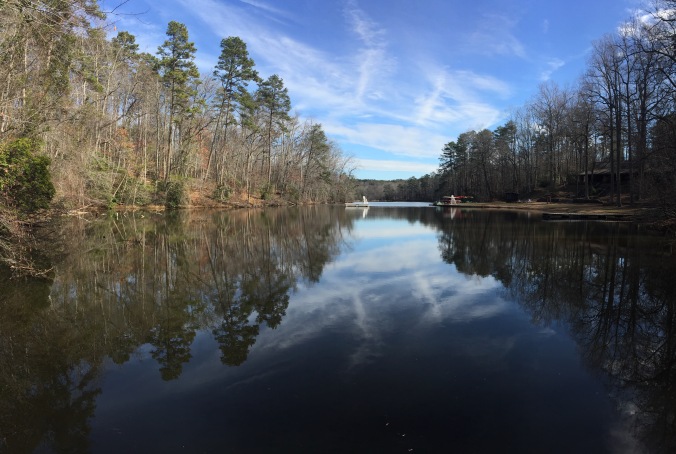
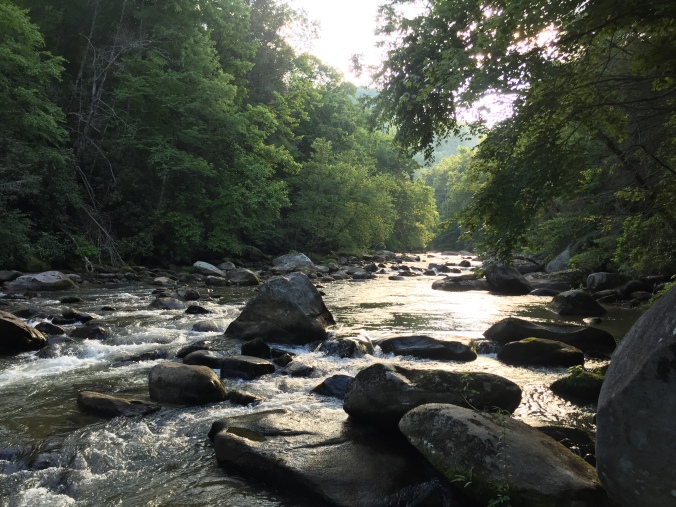
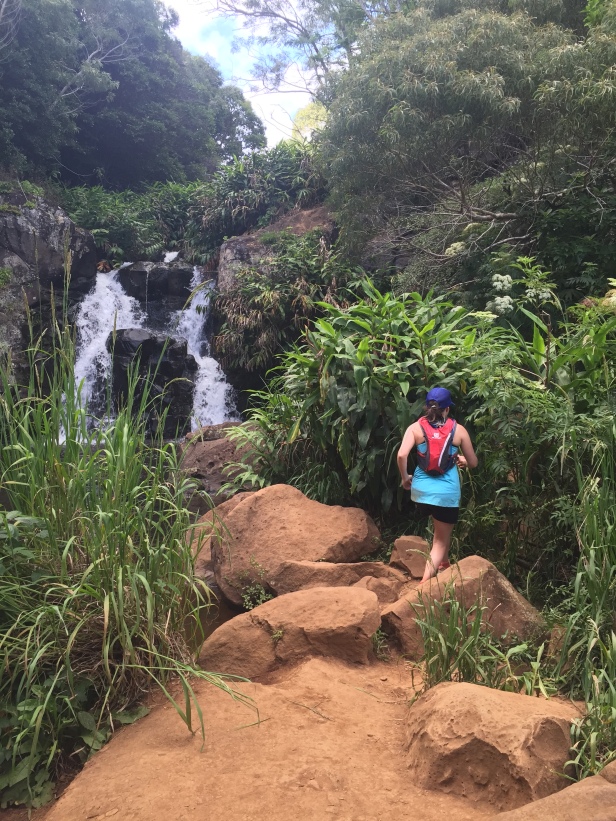
The run wove along Laurel Creek, which trips and plunges over the rocks, criss-crossing the Foothills Trail until it gushes off a cliff at the end. It culminates with an 80 foot high waterfall plunging into Lake Jocassee, the pristine mountain lake in Devil’s Fork State Park. I can’t wait to come back in the summer and take a dip at the halfway point of this run! That water is so beautiful, I was very tempted to take a jump in February.

Laurel Fork Falls at Lake Jocassee Foothills Trail

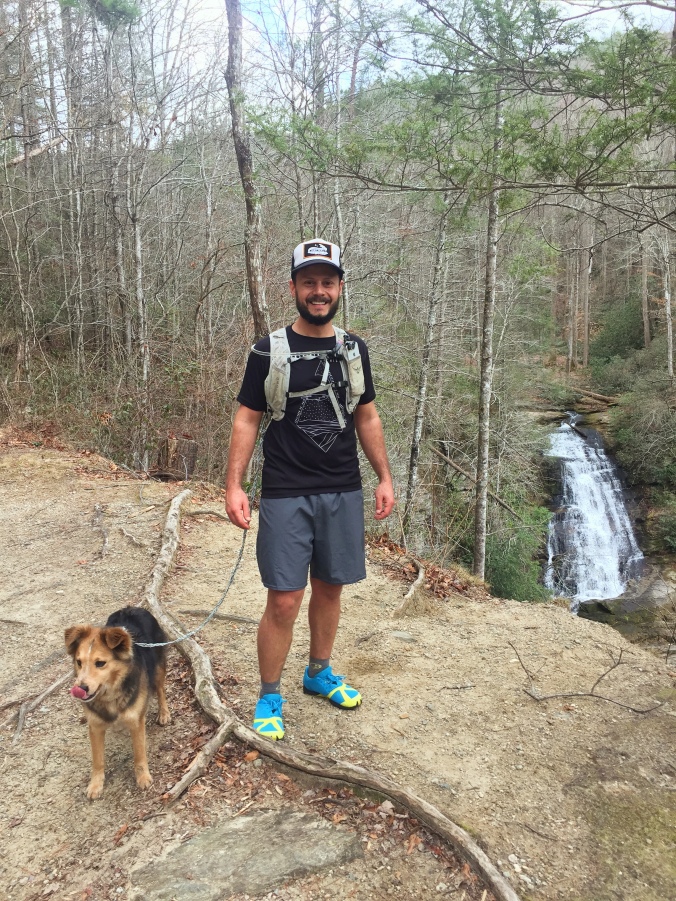
Along the way, you pass a smaller, but very beautiful waterfall called Virginia Hawkins. For a shorter outing this is a great option. If you hike or run all the way to Laurel Fork Falls and Lake Jocassee from Laurel Fork Gap, it is about 9 miles round trip; however, if you only go as far as Virginia Hawkins falls, it’s about 3 miles round trip.

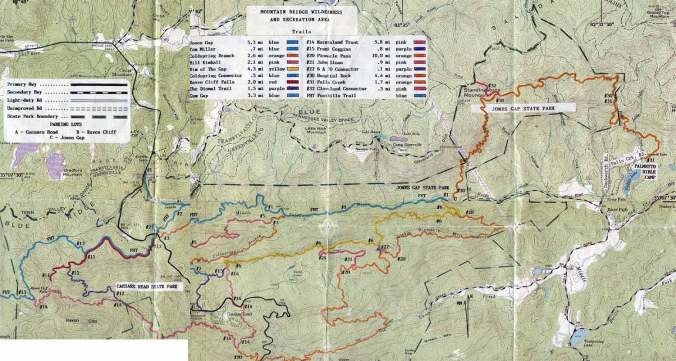
Getting Here:  Map your route to Horse Pasture Road Sunset, SC. This is a gravel road off of US 178 marked by a sign for the Foothills Trail. Follow the gravel road as it slowly climbs into the woods. You will pass a Foothills Trail parking lot on the left as you come in. Keep going (unless you want to add about 8 extra miles to your hike- you can jump on the Foothills Trail from this first parking lot but just be aware that it will add significantly to your elevation change and mileage and it is less scenic than later parts of the trail). After a few more miles you’ll come to an intersection with Cane Brake road leading off to your right and some small unmarked parking areas on your left. This is where we parked.

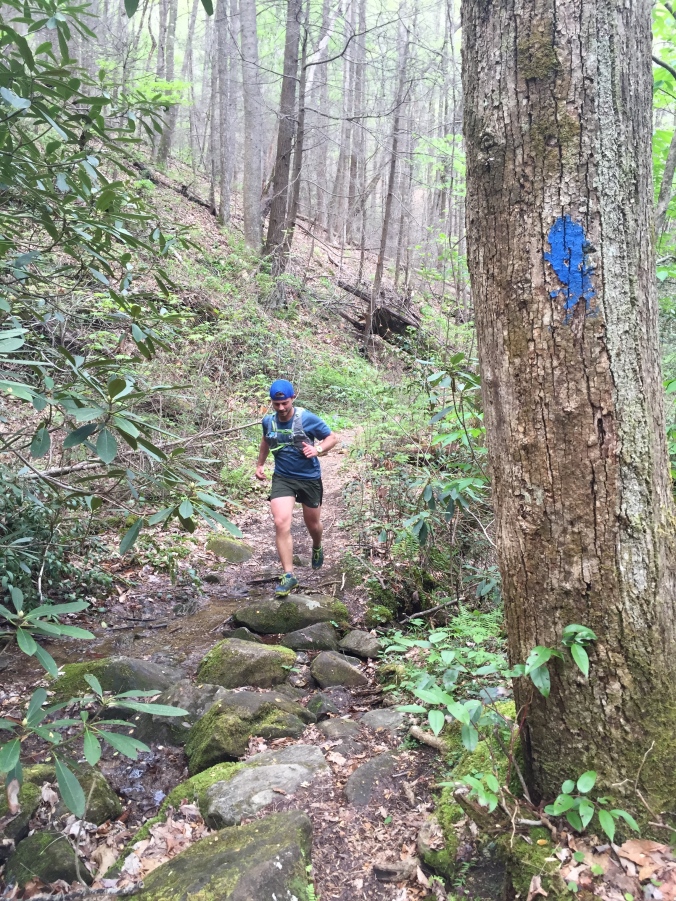
Begin your hike/run by taking Cane Brake Road up the hill. You will come to a gate that blocks drivers seasonally-just go around it. Continue to climb until you see the small white sign for Laurel Fork Heritage Preserve on your left and another wooden sign with yellow arrows pointing both directions to signify the intersection with the Foothills trail. Turn left at this intersection and very shortly you will come to a poorly marked right turn into the woods. That is the Foothills Trail and now you will begin to see white blazes marking it all along the way.

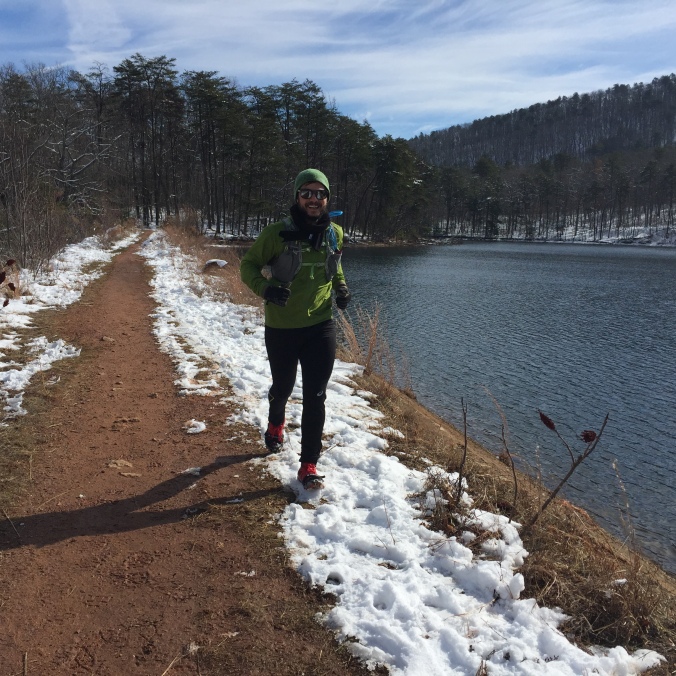
Most of this trail was easy to follow, but near the end it can be a bit confusing. To get down by the lake you need to take one last little spur labeled with a sign that says “Boat Access Spur .3 miles” (we thought it said 3 miles-thankfully that wasn’t the case).IMG_6477.JPG Good to Know: There really wasn’t much cell phone service in this area, so be prepared for that, take a buddy, and tell someone your plans. Bring water and snacks and wear good shoes with traction even if you’re not running. There is a decent amount of elevation change over the course of the run and some places are quite steep but it is well worth the effort!image-2-28-17-at-12-07-pm

Where to eat: We love hitting Sidewall Pizza in Travelers Rest on our way back into Greenville. It’s open a little later, you can eat outside if you feel grimy and their pizza, giant salads, and homemade ice cream really hit the spot after a long afternoon on the trail.

Paris Mountain State Park

img_2164

Mountain Lake,  Sulphur Springs Trail

It is easy to underrate the beauty of a place you see regularly because you’re used to it or to oversell it because it’s a dear old friend and your love adds value to it that others might not perceive. This has been my dilemma in writing about Paris Mountain State Park, the spot in our own backyard where we get outside most frequently.  A wild place, no matter how small will always contain surprises and even longtime neighbors can be strangers to us. So here is an introduction (or reintroduction for many in the Upstate) to one of our favorite places.

img_6291

Sulphur Springs Trail to Fire Tower

Paris Mountain is a solitary peak or monadnock roughly 6 miles north of downtown Greenville. The 1,540 acre state park is traversed by 9 trails covering around 15 miles. When you enter the pristine moss and tree-lined drive, you are transported quickly from the bustling ever-expanding city below to a peaceful natural playground. Hiking, camping, trail running and mountain biking are probably the most popular activities available, but there are also opportunities to fish in the 4 park lakes or swim and boat during the summer.

img_2788

Sulphur Springs toward Shelter 5

I love the fact that the foliage, the upper lakes, the loudly tumbling streams and certain steep rocky places make you really feel like you’re high in the mountains, very far away from civilization. This is a park where you can bag a mountain run on technical single track trails with well over a thousand feet of elevation gain or take a short leisurely walk around the lake before starting your picnic. We have been amazed to see how different activities in the same place can completely change our perspective. There are trails on Paris Mountain that we have run countless times only to hike them and catch views we’ve never seen–glimpses of a lake far below or the trail weaving above our heads. No matter which activity you choose, you can wrap it up and be back in town within 10 or 15 minutes (plenty of time left for pizza). It’s amazing!

img_6146

North Lake Loop

We have had the opportunity to explore nearly every nook and cranny of this park, and I can’t wait to share some of our favorite trail loops and activities in future posts. While Paris Mountain may not be as expansive as the ranges of mountains further north, it offers great variety, ever-changing beauty and fantastic accessibility. Get out and enjoy it today!

fullsizerender

Lake Placid

fullsizerender-2

North Lake

Keep looking for adventure far and nigh!


Green River Game Lands


img_2071

The Narrows

The Green River Game Lands-that name totally intrigued us. My husband and I were looking for somewhere fun to go explore and literally saw this on the map in a spot that looked somewhat close to Greenville (roughly 1 hour away). When I researched it a bit, we saw that there are multiple trails in the Game Lands and the whole area has a lot to offer. The Green River Narrows, famous for whitewater kayak racing, are nestled in this parcel of land and that ended up being our destination. We visited in early summer and did the Green River Cove trail to Pulliam Creek  as well as the loosely marked dive into the gorge in order to see the Narrows. What a cool spot! It is a surprisingly rugged, steep descent involving cables and requiring some careful stepping, but that only added to the wild isolated feel we were enjoying.


We ran as much of this as we could given our time and the terrain.  It ended up being about 8-9 miles round trip including the trail to the Narrows. Much of the  trail winds pleasantly along the river across rolling hills, but at the Narrows everything opens up giving the feel of a larger more substantial gorge. There was a fantastic waterfall pouring into the river and massive rocks were tumbled everywhere. It felt epic and we were the only ones there to enjoy it.

At the end of our run, we back tracked to a little parking area right before Wilderness Cove Tubing and Campground that provides access to the river via a short trail. This was a great cool down, but even better (if you have the time) is a 2 hour float down the Green River provided by Wilderness Cove Tubing. We tubed on a Sunday afternoon late in the summer and had a blast. It was relatively busy, but the river didn’t feel crowded. The rapids were fun without being scary-big and two hours was more than enough time to enjoy the scenery and soak up the cool water.

img_2112

The Green River


We hit two different restaurants on our return journeys, both of which were delicious! After the run, we caught pizza night at Wild Flour Bakery in Saluda, NC. Wednesdays and Fridays they offer wood-fired pizza from 5-8. It was truly delicious and relatively close to the Game Lands. After tubing, we visited Green River BBQ in Saluda. With live music and some of the best ribs I’ve ever tasted, it too hit the marks for convenient proximity and tasty food.

Altogether, this is an awesome little afternoon or day-trip. The drive to the Game Lands is relatively short, but quite scenic. The trails and the river are fantastic and the proximity to the cute mountain town of Saluda with multiple yummy restaurants sealed the deal. We will definitely return.

Keep looking for adventure far and nigh!

Getting There:  The parking area for Green River Cove trail access is off of Green River Cove Rd. just past Wilderness Cove Tubing and Campground. You can plug that address (3772 Green River Cove Rd. Saluda NC 28773 US) into your GPS, go just past it (maybe .1 mile or less) to a small pull-off on the right and park there.  Cross the road and you will see a private property drive. The entrance to the trail is off of that drive on the left.

We ran the Green River Cove Trail  about 3.5 miles, until we reached an intersection with Pullium Creek Trail veering to the right. We took this split and went about .75 miles on Pullium until we came to some pink tape (on our left) marking the trail down to the Narrows. This treacherous, rooty trail was between .25-.5 miles straight down to the river. Be very careful if you decide to attempt it, especially with a dog. It’s very steep, tricky footing.

img_2105


Seasonal Considerations: Hunting is permitted in the Game Lands  from September through May. If you’re planning to visit during this time, be sure to wear bright clothing or go on Sunday when no hunting is allowed. For more details on the hunting particulars and  trail information, I found this  online document  extremely helpful.

Also, there appeared to be a good amount of poison ivy in places during the late spring/early summer months, so be on the lookout for that if you’re sensitive to it.


Kauai Activities

IMG_0954

Stunning cliff trail to Waipoo Falls

While the Kalalau trail was a major priority and highlight for our trip, there were many other equally amazing adventures to be had on Kauai. Here are few more of our favorites. Most of the headings have links to more information and/or the exact company we used for a specific activity.

IMG_0505

Waimea Canyon

Western Kauai

Waimea Canyon– This place is unreal. People call it the Grand Canyon of the Pacific and it is pretty mind blowing. We did a couple small runs here too and would have loved to explore more.

Na Pali Coast Overlook- Amazing views of the coast and what looked to be some pretty sweet campgrounds along the way. This was an especially magical place at sunset. When we got there, almost no one was around. There were huge wild hydrangea bushes in full bloom and locals were hiking down past the fence to reach more views. It’s probably a little more dangerous than just taking things in from the overlook, but we couldn’t resist following just a little ways to check it out.

DCIM100GOPRO

Just below the Na Pali coast overlook

The Saddle Room – Delicious burger place in Waimea. Fun atmosphere and really good food. It is pretty low key, but it’s attached to Wrangler’s, a fancier steak house.

Little Fish Coffee– This was a really fun coffee spot in Hanapepe. We had wonderful affogatos here.

Na Pali Coast Kayak Trip– The most intense kayaking trip I’ve ever done. The company we went with calls it the Mount Everest of kayaking and awards you a certificate upon completion of the excursion while National Geographic has named it one of the top 40  Best American adventures. It’s around 17 miles of guided sea kayaking. You get to see the entire Na Pali coast up close in one day as well as spinner dolphins, sea turtles, waterfalls,  awesome beaches and much more. The trip includes lunch and guides (which we were SO grateful for).

DCIM100GOPRO

Na Pali Coast paddling trip

After doing the trip, I had no desire to ever try it unassisted. The conditions felt a little crazy to me and apparently it was a very average day in regards to ocean swell, wind, etc. When you look at the ocean from a distance it looks relatively smooth, but when you are actually out on the ocean you can get on these massive swells and backwash off the cliffs that make your neighbors disappear and send you soaring.  It’s very cool, but it is no joke. We fell out once or twice, as did most of the group, and it really wasn’t a big deal since we had an easy system for getting back in, we were wearing pfds and everything we brought was in waterproof bags lashed to the boat; however, it was a bit scary initially and it definitely cemented my healthy respect for the ocean. The guides give you great safety training and directions and they are especially helpful during the beach landings where you can get pummeled if you’re not careful.  I had the misfortune of feeling seasick for about half the trip, so I would highly recommend bringing a remedy for that if you have ever had any semblance of motion sickness.  I never actually got sick, but other people did and it takes away from a really exciting and amazing experience. It is very cool to propel yourself through the ocean along one of the most beautiful places in the world–absolutely unforgettable!

DCIM100GOPRO

DCIM100GOPRO

Polihale Beach, the gorgeous finale of the trip

North Shore Kauai

Kealia Farm Market- This small market was our favorite by far! We got INCREDIBLE fresh sashimi grade tuna for a really reasonable price, as well as some beautiful vegetables. The guy who sold the fish also served a couple of cooked dinner items ($7-10). They were amazing as well. 3-7pm Mondays and Fridays, bring Cash

IMG_0436

Kealia Farm Dinner- grilled pesto fish with local greens


Ke’e Beach– The “end of the road” northernmost beach at the base of the Kalalau trail. This spot was beautiful–cliffs plunging into the Pacific Ocean–and we had our best snorkeling here.

DCIM100GOPRO

Ke’e Beach from the water

Kamokila Hawaiian Village–  This was a really neat spot near Kapaa. We toured the village, rented kayaks for a very reasonable price and did a short paddle on Wailua River + a hike to a waterfall. Great shaved ice in a food truck on site!

“Tourist” Lumahai Beach – Gorgeous beach, local favorite, not great for swimming depending on the season. It was calm while we were there (in early June) and lots of people were jumping off the lava shelf into the ocean, but apparently it can be very treacherous at times.

image

Tourist Lumahai

South/East Kaui

Wailua Shave Ice– This was probably my favorite shaved ice spot. It was the last one we went to and it was really great. They make all their ices with local fruit–so delcious–and they had a yelp coupon the day we went!

The Greenery– Amazing restaurant in Lihue featuring local, organic soul food fare. This is where we landed, jet-lagged and starving after leaving the airport. It was incredible. They were about to close for the day, but with true Hawaiian hospitality they served us some absolutely delicious food.

IMG_0471

The stunning local fruit

Huli Chicken– This is an easy-to-miss roadside stand in Anahola. They slowly grill whole chickens over hot coals and it is outrageously moist and flavorful. They have limited hours and do sell out so get there early if you can. We also got mountain apples at their farm stand.


image

Keep looking for adventure far and nigh!


Kalalau Trail Run

IMG_0411

Kalalau Trail, Na Pali Coast of Kauai

One of our top priorities in Kauai was doing a long run on the Kalalau trail along the Na Pali coast. You absolutely have to check out this trail if you go to Kauai. Even if you just hike the first mile or two, you will see so much beauty and catch absolutely epic views of dramatic cliffs and sparkling little beaches. The tropical plants, flowers and birds are surreal and if you can get past the more crowded beginning of the trail it really starts to feel prehistoric out there–quiet and beautiful like the world was just created. This place is stunning and totally draws you in, but we had a rather difficult time sorting out what was possible for us to legally do in a day trip. If you go to the Hawaii State Parks website  you will see all the rules and warnings about how far you can go with and without a camping permit. As of March 1, 2015, you have to get an overnight camping permit to hike/run beyond Hanakapi’ai Beach (2 miles in), even if you’re not camping. The goal of this is to prevent overcrowding, reduce trash, and increase safety on the trail which is obviously great; however, we were super disappointed when we saw that because the permits were completely gone for the time frame we were traveling. Thankfully, we emailed the park and got permission to run 6 miles in. So, if you don’t get an overnight permit and you’re truly planning to run in and out on the same day over the course of a few hours, an email may be worth a try.

DCIM100GOPRO

Hanakapi’ai Beach: 2 miles in, usually a little rough for swimming

It is important to note that the trail is pretty intense, with water crossings, sheer drop offs and loose rocks in some places (especially after the first two miles). In the 6 mile section that we tackled, it never got to the really tricky, edge-along-on-your tiptoes, total palm sweat areas that we saw on some You Tube videos, but it is good to be careful and more aware the further you go. The trail is also extremely hilly and potentially very hot with a lot of direct sun on the exposed ridges. Within our 12 mile round trip jaunt on the trail, we gained nearly 10,000 feet of elevation. It was crazy. The views are so distracting and the whole thing feels like such a massive adventure you don’t realize how much you’re doing until the exhaustion starts setting in. That’s why you will see many warnings on the internet, in guidebooks, and even at the trail head. It is kind of wild out there and depending on the weather, it can get pretty sketchy.  You absolutely have to be careful and know your limits, but if you can manage that, it really is an adventure of a lifetime.

image

The View

My biggest piece of advice based on our experience is to bring plenty of snacks, water and some kind of water treatment in case you run out. We are experienced trail runners, but we still underestimated the time it would take us to do this run and used 3 liters of water between the two of us before running out with a mile or two to go in the blazing sun. Thankfully, it worked out and some angelic person was selling coconut water straight from the coconut at the bottom of the trail, but it was sobering to us to realize how close we cut it. Multiple times we have looked back and decided it was a miracle our water lasted as long as it did. So, pack carefully and try not to over do it even though it is very tempting to just keep going!

Note: Parking at the trail head is limited and can fill up pretty early in the day. We ending up parking at Tunnels Beach and starting the run on the road. This is not ideal as it added 3 miles to the run, but it is an option if there is no parking. Also, bring along plenty of snacks/food for after the run too. My memory is that there were not tons of places out there to grab dinner.

DCIM100GOPRO

Deep in the Na Pali Coast


DCIM100GOPRO

Views down the coast

Keep looking for adventure far and nigh!!

Jones Gap Trail

IMG_2686

Several months ago, I mentioned Jones Gap State Park as a must-see nook in the Upstate’s park scene. At that time, we were working on completing an out-and-back route on one of the main trails, Jones Gap Trail. We have since completed it twice, run large chunks of it many times and started counting it as an all-time favorite. It is between 10 and 11 miles long, depending on whether you start/end at the parking lot and which fork you take at the end of the run, and it is a perfect run for easing into more distance on the trail. It is one of those trails that climbs so gradually, you hardly notice it visually. If you are like David and me, you feel a slight persistent burning that gets chalked up to “warming up” or a “rough start” and it’s not until you come flying down on the return journey, feeling like a million bucks and thinking about how great your endurance is that you begin to suspect, “Oh, maybe this whole run was uphill until I turned around. That’s why I felt slightly terrible at the beginning and now, I feel awesome!

IMG_2626This scenario played out multiple times, but ironically, by the end of every run on this trail, we would always forget that the first half was somewhat challenging and log the run away as basically flat and pretty easy. Then we would come back to it months later and wonder how we ever arrived at that conclusion–until the massive gradual downhill hit again, boosted our energy, and supplied so many endorphins that once again we forgot that we climbed uphill for more than 4-5 miles.

IMG_2609

Finally, sometime last year we conquered this run in it’s entirety and it was such a good feeling. We had almost finished so many times, but something always prevented it–lack of snacks, lack of time, early trail closing etc. This continues to be one of our favorite long run locations. It is always beautiful and exciting to look forward to our favorite creek crossings and waterfalls along the way.

IMG_2698

Getting there: Jones Gap State Park is located about 45 minutes from Greenville and only 25 minutes from Travelers Rest.  We typically take 25 N, make a left onto Gap Creek Road and follow it back to the park, but there may be quicker routes depending on where you are coming from.  Once you park in the main lot, follow the small spur trail (a nice mulched path) into the woods, cross the foot bridge over the bubbling mountain stream and make your way left down the sidewalk toward the ranger station (on your right) and another bridge which you will cross. The trail and trail map are on your right. Take Jones Gap Trail all the way to its conclusion and turn around to return the way you came.

What to eat: We love hitting Sidewall Pizza or Tandem Creperie in TR on the way home. Both places are amazing and we enjoy both regularly as we come and go from this run.

IMG_2714

Zoe on the dog-friendly porch at Tandem post-run

Good to know: Cell service on Gap Creek Rd. and in the park are very spotty. There are nice bathrooms in the park on the way from the parking lot to the main trail. Near the end of the trail, you will have the option of taking a foot bridge that leads to the right or continuing straight. Going right, over the bridge, takes you to the end of Jones Gap trail. Continuing straight takes you up one more sizable hill to another parking area. Both routes are great, but the straight route is definitely more difficult.

Art Loeb Trail Run- Black Balsam to Shining Rock Loop

Art Loeb Trail, Tennent mountain near Black Balsam Knob in Shining Rock Wilderness, Trail Running

Location: This is an amazing trail with stunning panoramic views of the mountains, Shining Rock Wilderness, and Pisgah National Forest. The section of the Art Loeb Trail beginning at Black Balsam Knob, is beautiful and challenging.  There are ups and downs, technical footing, and a lovely variety of sceneries.  It is great for hiking or running. We completed a roughly 9 mile loop that included one section of out and back running. The exact route we took is detailed below.

Getting There: Black Balsam Knob is about 1 hour 45 minutes away from the Greenville area. If you’re leaving Greenville, take 25 N towards Hendersonville to 26 W. Get off at Exit 37, turn left NC-146 W. Take a right on Clayton road. Continue 1.3 miles. Slight right onto NC-191 N. Continue 1.2 miles. Turn left onto the Blue Ridge Pkwy. Continue 26.8 miles. Then, turn right onto Black Balsam Knob Rd. Continue to the end parking lot or park in one of the designated spots along the road. The Art Loeb trail begins on the right side of Black Balsam Knob Rd. as you’re driving in towards the parking lot. There are parking spaces beside the trail head and it is well-marked.

What to Bring: Running shoes- preferably trail shoes, lots of layers- It is always colder here than in the valleys and the weather can be very changeable at this altitude (around 6,000 ft), water/snacks (for during or after since you’re a bit isolated from restaurants and stores), change of clothes if you run it and don’t want to feel sweaty or chilled all the way home

Where to Eat: We love having a fun meal to look forward to after a big run. Farm Burger in Asheville, NC is one of our current favorites and an easy detour on the way back from Black Balsam (roughly an hour from Black Balsam). West First Pizza in Hendersonville, NC is another awesome post-run stop (also roughly an hour). We’ve enjoyed Mayberry’s Soups and Sandwiches in Brevard on several occasions too (around 45 mins away).

Art Loeb Trail to Shining Rock Wilderness

What an enchanting run this is. David and I have run and hiked parts of this loop on multiple occasions, but until this day, we had never delved very far into the Shining Rock Wilderness. We needed a longer run since we were training for a trail half marathon and we always like having a goal destination to run to, so we decided to try to find Shining Rock. Until planning this run, I didn’t know that there was in fact a “shining rock” which gave the wilderness area its name. As it turns out, there is snow white quartz at the top of a mountain in the wilderness area which is rather eye catching amidst the other more common rock features in the area.

IMG_1873

View from the top of Shining Rock including some of the unusual snow quartz.

We parked at the trail head for the Art Loeb Trail which is found on Black Balsam Knob road. Our run took us up and over Black Balsam Knob and Tennent Mountain, through a large gap-like clearing area with signage pointing towards Ivestor Gap and then through Ivestor Gap itself where we were welcomed to the Shining Rock Wilderness. Here we decided to stay to the right on the Art Loeb trail instead of taking the left fork onto Ivestor Gap trail. We tried to stay on the Art Loeb for our entire outward journey just to keep it simple and avoid getting lost.

IMG_1856

This led us around and over another mountain which I believe was Flower Knob. It was kind of hard to tell because once you’re in the wilderness area nothing is signed. We got to a smallish grassy clearing eventually where there was a piece of orange/pink tape dangling. This seemed to mark the spot where Ivestor Gap trail emerged from our left, but we weren’t positive about that either. We kept going along a bit of a ridge line until we started climbing once more. We had begun to wonder if we were still headed the right direction when we hit over 4 miles with no sign of the white quartz that would mark Shining Rock, but at last it started to appear scattered along the path. We hit the top around 4.5 miles which was what we had hoped would be the case based on our research of this route. After some pictures, we turned back retracing our steps exactly until we came to the clearing at the base of Tennent Mountain. Instead of ascending on the trail to the left, we took the lower trail to the right which circumvents Tennent and Black Balsam returning you to the parking lot at the end of Black Balsam Knob road. This path is pretty wide and flat, however there are a ton of loose rocks, and if it’s rained lately the whole thing can be somewhat flooded. This does not make it impassable, but it can slow you down if you don’t want wet feet.

The only bummer about looping back like this is that you have nearly half a mile on the road once you reach the parking lot if you parked at the Art Loeb Trail head. We always dislike ending on pavement after longer runs. It just hurts, but finishing the loop is satisfying and at least the footing was super easy! If you need a great day hike, trail run, picnic or backpacking spot, this one is hard to beat. You could go out for a much shorter distance and still enjoy stunning views and wild beauty. Keep looking for adventure far and nigh!

IMG_1832

Jones Gap State Park Trail Run

IMG_6471

May 13, 2014

If you live anywhere in the Upstate and have not yet discovered Jones Gap State Park, you are missing out. It is a verdant pocket of forest, divided by a clear, bubbling mountain stream that shrinks and expands as it traverses the park. The area is speckled with waterfalls, both large and small, which make for great hiking/running destinations, and as we recently discovered, the opportunity for some pretty noteworthy mountain running experiences.

IMG_6462
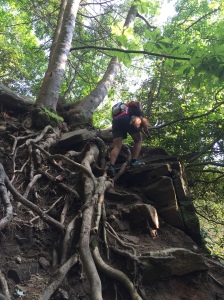
Over the past few years, my husband and I have run, hiked, camped, and explored this area in multiple directions. I will be sharing several adventures from this place, but I had to begin with our most recent new discovery: The Rim of the Gap trail. I have seen this intriguing trail name on the map since we began coming to Jones Gap; however, that interest was tempered by some things we heard early on about its high level of difficulty, several bear sightings, and its closure during the winter because of ice accumulation. The rumors made it feel ominous, intimidating, out of our league and far more wild than your average South Carolina state park. So on this rather muggy May day, we were not expecting to just take a little jog on this crazy beast of trail, but that is exactly what ended up happening.

IMG_6469

We arrived in the late afternoon, decked out in running gear and excited to try our new-ish hydration packs on a run where we might actually need the extra water. As we perused the map, we were approached by a ranger who wanted to warn us about the trails closing an hour before sunset. With disappointment, we realized we probably couldn’t tackle our 10.5 mile arch-nemesis, the out and back Jones Gap trail that we had been attempting to complete off and on for awhile. We had made a half-joking “vow” to ourselves that we would not return to the park or at least not that trail unless we were ready to just finish it, so we had quite the dilemma. That’s when we asked our new ranger friend  about the Rim of the Gap trail. Is it runnable? Is it crazy? How long is it? Overall, he downplayed the whole thing while simultaneously telling us the elevation gain was significant, around 1400 feet but also pointing out a 5.5 mile loop that only involved a portion of Rim of the Gap before cutting across on a connector that linked to Little Pinnacle Mountain via the Pinnacle Pass trail. This is what we ended up running and it was amazing. It was crazy, but very cool.

IMG_6474Almost immediately, the trail starts climbing and we were huffing and puffing and just barely power hiking our way through certain sections. Then we came to a rock you have to climb over with the help of a cable, and we knew this was going to be one of our more epic and memorable runs. The trail climbs and climbs, but thankfully the forest is so beautiful. We felt certain that we were experiencing almost of all of the elevation gain for the whole trail as we crept along, telling ourselves this was a killer workout even if we were barely moving in multiple places. You have to pay attention to the signs and blazes along the way, but the trails are well-marked. When you get to the turn for the connector and move on to the Little Pinnacle trail, you begin to get steep downhill sections that provide some relief for the legs, but also require a great deal of caution. The highlight of the whole run is the view you get just past the Mountain Bridge trail marker 20, pictured above. We were not expecting things to open up like they did, so it absolutely stunned us to see the waves of mountains and sky burst through the trees.

IMG_6491

I would totally recommend this as a hike or a run. It is so beautiful and the distance isn’t too intense. While later parts of the Rim of the Gap are apparently far more treacherous, this section was really not terrible. You get enough elevation gain and rock hopping in to feel pretty hardcore, but you also are not forced to inch along any narrow ledges or cross waterfalls with a cable (From what I hear, there may be some of that further up the Rim of the Gap trail). The downhill sections were what felt the most dangerous to us, but we just took it really slow in those areas and did not have any problems.

IMG_0152

Recommendations: Bring water and a snack in case your adventure takes longer than planned. There are plenty of spots to stop and rest if needed, and it’s nice to refuel a bit along the way. Definitely wear shoes designed for hiking or running that have some traction. Also, keep in mind that you could be out for a good chunk of time. We were running (as much as possible) and it took us around 1 h:45mins. That is a good bit longer than our normal 5.5 mile run :). Also, be very careful on the steep sections, particularly the rocky downhill sections, and I would probably avoid this during a torrential downpour if possible. Always remember to exercise caution on unfamiliar terrain, and fill out a hiker check-in before you start.

Enjoy the gorgeous views and keep looking for adventure far and nigh!

Santee Surf and Turf Triathlon & Biathlon

photo-7

Rounding the bend at the turn around point

April 26, 2014

Trail Run + Kayak + Mtn Bike + BBQ= AWESOMENESS. This is the tagline that drew us into a race comprised of 3 miles trail running, 3 miles flat-water kayaking or 1.5 miles SUP, and 8 miles of mountain biking for the triathlon option. Who wouldn’t be intrigued by the sound of that adventure party? Three fun sports followed by BBQ, is difficult to pass up. Evidently, Adventure Geek Productions has been putting on some form of this race for the last 4 years, but we have never heard anything about it until we stumbled upon it via the internet one evening about 3 weeks before it was due to take place. We were super excited because the distances for this race are not crazy long and it is a unique combination of disciplines for a tri or biathlon.

Once we discovered this event, we immediately tried to talk several different friends and family members into doing it with us, but with only a few weeks notice, there were no takers. Despite our initial excitement, we went back and forth about it for quite a while, halfway training and allowing the signup deadline to creep closer and closer. Finally, with only hours to spare we signed up. David picked the triathlon, because he is a beast in possession of a sweet new-to-him mountain bike, while I opted for the easier biathlon which took out the biking. With some trepidation, we loaded up our gear and headed south, joined by a couple of great friends who agreed to hang out and kindly helped with water, gear etc.

The lakefront course and the beach (photo credit: Garrison Morris)

The lakefront course and the beach (photo credit: Garrison Morris)

We arrived about an hour and a half before the race started, checked in and got instructions about where to station our kayaks on the beach. It is a first come, first serve situation for getting your paddling position so we were glad to be there in enough time to have a couple options left. My husband and one of our friends carried the boats down and strategically picked a spot by some very cool racing kayaks. While we were getting situated we met a super nice couple who had done the race multiple times before. They provided some great insider tips about where the run dumped out and the distances between the run finish line and the kayak start. This definitely helped to ease our nerves, but everyone around us looked so hardcore and intense, we still felt like we might get destroyed in each of our respective races.

To begin the event, they gathered everyone at the start/finish line and directed us into the woods where we followed red arrows for the run and passed blue arrows that directed mountain bikers during the third leg of the race. The race started almost at a diagonal left, across an open grassy area, past the bike staging zone as well as some picnic spots. That was the only slightly confusing part of the race. We had never run at Santee before, so we didn’t know where the trail was going to begin and as previously stated it wasn’t really a straight shot out of the start line. After we got into the woods, turns were clearly marked, and the course was pretty flat and easy, covered in packed dirt and pine needles. As soon as we hit the finish line our kayak time began. We ran a little more than a quarter of a mile to the boat launch, threw on our pfds, and got launched by the volunteers. The kayak course was two 1.5 mile loops that paralleled the shoreline. If you used an SUP (we did not), you only had to do one loop. Once we finished that, we hopped out of our kayaks as quickly as possible and ran back to the start/finish line. For me, that was the end of the race. David changed shoes, strapped on his helmet and hit the trails again for the 8 mile bike ride. The biking definitely added a significant level of challenge to this event. It wasn’t steep or super technical, according to David, but doing three events over two is definitely more exhausting. Still, we both had very solid finishes. David was 11th overall in the triathlon and I won the much smaller biathlon.

IMG_6319

Final pump to the finish

All together, I would heartily recommend this event. It’s a unique challenge to do multiple activities back to back, and we appreciated the fact that this tri/biathlon was off-road and did not involve swimming, a sport we are definitely not in shape for right now. You can rent kayaks through several different outdoor vendors connected to the race which is helpful if you don’t own a boat, and the field of participants is not huge which we found less intimidating. The post-race party atmosphere was great too, with food, plenty of Heed and water, and great camaraderie. If we do it again next year, I would definitely work on my biking and try to do the triathlon, but the biathlon is a great option if you don’t bike. The race can also be run as a team, so grab some friends and start planning for next year’s Santee Surf and Turf Triathlon & Biathlon.

IMG_0092

Please note the ample BBQ and the Start/Finish line behind us 🙂

Keep looking for adventure far and nigh!

For more details about this race and other fun events sponsored by Adventure Geek Productions check out this website: http://www.adventuregeekproductions.com/santee-surf-and-turf.html

Trail Run on Pinnacle Mountain

IMG_4978

Bald Rock

January 24, 2014

Driving down Hwy 11 with hardly a cloud in the sky, I tried to convince myself that the sun would really offset the 20 degree temperatures uncommon for most of the year in Greenville. This was not the case. It was cold and breezy enough to make my lungs burn and tickle with coughs for hours after our run was complete. The lung-burning was probably not entirely weather related since the run we did includes a 2,000 foot elevation gain that takes place over the first half of the run. Was it worth it, you may ask? The cold, the coughs, the combusting thigh and calf muscles. I would still say yes. I love this run for the challenge it presents. Still, it has not ceased to be a bit daunting every time we decide to confront it. For close to 4 miles, you climb the trail that begins at Table Rock State Park Nature Center. There are many rocky steps in the first couple of miles and even the smoother paths later on are deceptively steep and challenging, but the views are stunning and the sense of accomplishment you get from crossing over this mountain makes it all worth it. It’s also a killer workout and a good confidence boost if you’re training for any kind of more moderate trail run. The run down the mountain is an exercise in balance and precision as you plummet dramatically down from the small clearing at the top. Again you are treated to amazing views, particularly at Bald Knob. The entire loop clocked out at 8.1 miles, and took us well over 2 hours to run with stops for pictures, shoelace malfunctions, and a pre-run bathroom break all added in.

Run this trail: Go to Table Rock State Park, SC. Start on the trail that begins by the nature center. Take Table Rock trail up a series of rough steps and linking trails, passing a shelter/lookout around 2 miles and continuing until you reach a second fork. You will take a left to head up Pinnacle mountain instead of the more common hike to Table Rock. Eventually you will pass a sign that says .9 miles to the top. (Warning: This last section can feel so long!) You will reach a clearing. To the left of the clearing the path continues sharply downhill. You will reach Bald Knob , an exposed face, in less than half a mile. Keep going to the left across Bald Rock and back into the woods. Continue down following blazes until you reach the path marked by three colored blazes. Take that back to the Nature Center.

Recommendations: Bring water on this run! It can get long and it’s pretty strenuous . You also might want to bring a snack at least for when you’re done if not for during the run. Watch out for bears during the summer. Wear trail shoes if you have them. You will enjoy the extra traction.